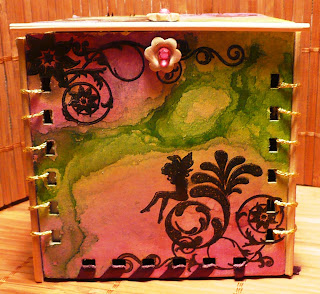

Here is a box I have made using my Zutter. Not just to punch the holes, but I have also used binding wires to attach the lid. Scroll down to see how I made it!
Zutter Bind-it-All learning experience!

 On what will be the outside of the panels I have sprayed three colours of Glimmer Mists; Honeydew and Meadow Green, and Juneberry Wine. I have tried to keep the colours mainly separate. Then, to get the water mark effect, I use my heat gun to dry the Mists after letting them settle for a couple of minutes. The result is quite lovely!